Unix_shell
Downloading VirtualBox
-
To download VirtualBox, go to the official site Virtualbox and download the latest version for windows.

Beginning with the Installation:
-
Getting Started:

-
Select Installation Location:

-
Creating Entries and Shortcuts:

-
Ready to Install:

-
Installing Files and packages:

-
Finished Installation:

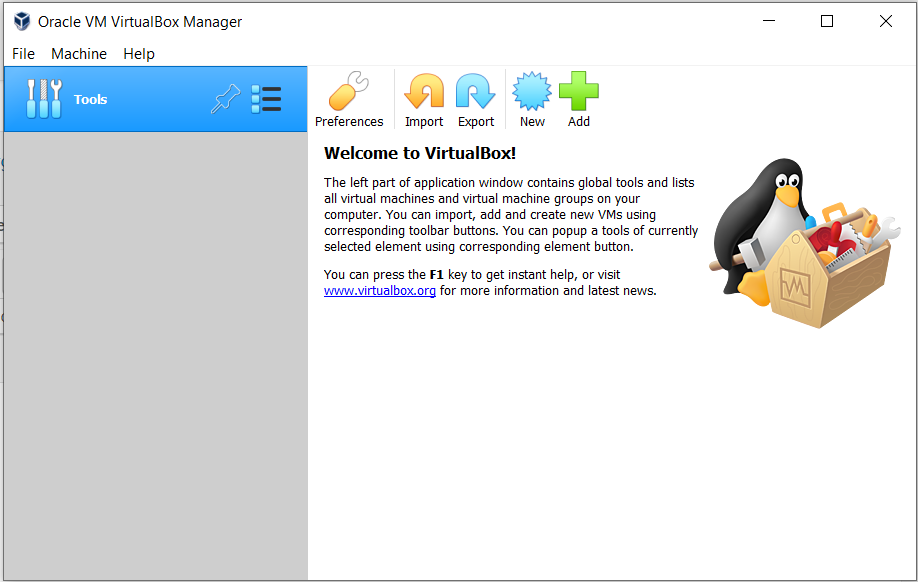
When you will open virtualbox it will look like as shown below:
How to Install Debian 12 on VirtualBox
Pre-requisite
- Download the Debian 12 ISO file from its official website.
Step 1: Create a Debian 12 Virtual Machine
-
Open VirtualBox and click on the New button.
-
Enter VM Name and Location:
- Name: Debian 12
- Location: Choose your preferred folder
- Type: Linux
- Version: Debian (64-bit)

- Allocate System Resources:
- Memory (RAM): Recommended at least 2 GB
- CPUs: Allocate at least 2 CPUs

- Set Storage Space:
- Recommended: 20 GB (Adjust if needed for more applications)

- Verify and Create:
- Review all the settings and click on Create.

Step 2: Install Debian 12 on VirtualBox
- Start the VM:
- Click on the Start button.

- Click on the Start button.
- Mount ISO File:
- If not already linked, add the ISO file path and click on Mount and Retry Boot.

- If not already linked, add the ISO file path and click on Mount and Retry Boot.
- Select Installation Type:
- Choose Graphical install.

- Choose Graphical install.
- Language Selection:
- Choose the language for the installation process.

- Choose the language for the installation process.
- Location Selection:
- Set your location for time zone configuration.

- Set your location for time zone configuration.
- Keyboard Layout:
- Choose the appropriate keyboard layout based on your language.

- Choose the appropriate keyboard layout based on your language.
- Configure Network:
- Hostname: Enter a name for your system.
- Domain Name: Enter if applicable or leave it blank.


- Additional Installation Files:
- Select No if no additional files are needed.

- Select No if no additional files are needed.
- Mirror Location:
- Select the nearest country for the Debian mirror list.

- Select the nearest country for the Debian mirror list.
- Debian Archive Mirror:
- Choose the default mirror if no preference.

- Choose the default mirror if no preference.
- Proxy Information:
- Enter if needed, otherwise leave blank.

- Enter if needed, otherwise leave blank.
- Begin Installation:
- Wait for the installation process (can take up to 30 minutes).

- Wait for the installation process (can take up to 30 minutes).
- Create Admin User:
- Set up an admin user and password.

- Set up an admin user and password.
- Create Normal User:
- Create another user without admin rights if needed.


- Create another user without admin rights if needed.
- Set Time Zone:
- Select the appropriate time zone based on your location.

- Select the appropriate time zone based on your location.
- Partition Disks:
- Choose to manually create partitions or use the entire disk.


- Choose to manually create partitions or use the entire disk.
- Format Disk:
- Confirm the partition scheme and format the disk.


- Confirm the partition scheme and format the disk.
- Popularity Contest:
- Choose whether to send system statistics to the Debian community.

- Choose whether to send system statistics to the Debian community.
- Select Desktop Environment:
- Choose a desktop environment (e.g., GNOME).

- Choose a desktop environment (e.g., GNOME).
- Install GRUB Bootloader:
- Install GRUB to manage the boot process.


- Install GRUB to manage the boot process.
- Reboot System:
- Complete the installation by rebooting the system.

- Complete the installation by rebooting the system.
Following these steps will help you successfully install Debian 12 on VirtualBox, allowing you to explore and utilize the Debian operating system in a virtual environment.
Chapter 1: Introducing the Shell
Overview
Questions
- What is a command shell and why would I use one?
Objectives
- Explain how the shell relates to the keyboard, the screen, the operating system, and users’ programs.
- Explain when and why command-line interfaces should be used instead of graphical interfaces.
Background
Humans and computers interact in various ways, such as through:
- Keyboard and mouse
- Touch screen interfaces
- Speech recognition systems
Graphical User Interface (GUI)
- The most widely used method to interact with personal computers.
- Uses menu-driven interactions and mouse clicks.
- Intuitive but scales poorly for repetitive tasks.
Command-Line Interface (CLI)
- Uses text-based commands.
- Scales well for repetitive tasks.
Example
Using a GUI to copy the third line of 1000 text files in different directories is time-consuming and error-prone. The Unix shell, a CLI, can automate and speed up this process.
The Shell
- A program where users type commands.
- Can invoke complex programs or simple commands.
- Popular Unix shell: Bash (Bourne Again SHell).
- Git Bash: Allows Windows users to use a Bash-like interface with Git.
Learning the Shell
- Requires time and effort.
- Unlike a GUI, CLI requires learning specific commands.
- A few essential commands can achieve a lot.
Advantages of the Shell
- Combines existing tools into powerful pipelines.
- Handles large volumes of data automatically.
- Scripts improve workflow reproducibility.
- Easier interaction with remote machines and supercomputers.
- Essential for specialized tools and high-performance computing.
Getting Started with the Shell
The Prompt
- Indicates the shell is waiting for input.
- Usually represented by
$. - Do not type the
$when entering commands. - The cursor indicates the typing position.
Example
$ ls
- Lists contents of the current directory.
- If a command is not found, an error message is displayed.
Common Error
$ ks
ks: command not found
- Occurs if the command is mistyped or not installed.
Nelle’s Pipeline: A Typical Problem
Nelle Nemo, a marine biologist, needs to process 1520 samples using an imaginary program goostats.sh.
Problem
- Running
goostats.shby hand using a GUI takes over 12 hours. - Using the shell, Nelle can automate this task and focus on writing her paper.
Skills Nelle Needs
- Navigate to a file/directory
- Create a file/directory
- Check the length of a file
- Chain commands together
- Retrieve a set of files
- Iterate over files
- Run a shell script containing her pipeline
Key Points
- A shell reads commands and runs other programs.
- This lesson uses Bash, the default shell in many Unix implementations.
- Programs run in Bash by entering commands at the command-line prompt.
- The shell has a high action-to-keystroke ratio, supports automating repetitive tasks, and accesses networked machines.
- A significant challenge is knowing which commands to run and how to run them.
Chapter 2: Navigating Files and Directories
Questions
- How can I move around on my computer?
- How can I see what files and directories I have?
- How can I specify the location of a file or directory on my computer?
Objectives
- Explain the similarities and differences between a file and a directory.
- Translate an absolute path into a relative path and vice versa.
- Construct absolute and relative paths that identify specific files and directories.
- Use options and arguments to change the behavior of a shell command.
- Demonstrate the use of tab completion and explain its advantages.
Key Concepts
- File System: Manages files and directories. Files hold information, and directories (folders) hold files or other directories.
- pwd (print working directory): Shows the current directory.
- ls (list): Lists the contents of a directory.
- cd (change directory): Changes the current directory.
Commands Overview
- pwd
- Shows the current working directory.
- Example:
$ pwdmight output/Users/nelle.
- ls
- Lists the contents of the current directory.
- Example:
$ lsmight output:Applications Documents Library Music Public Desktop Downloads Movies Pictures - Options:
-F: Classifies the output by adding markers to file and directory names./indicates a directory.@indicates a link.*indicates an executable.
- cd
- Changes the current working directory.
- Example:
$ cd Desktopmoves to the Desktop directory.
The File System Structure
- Root Directory: The topmost directory, represented by
/. - Home Directory: User’s personal directory, e.g.,
/Users/nelle. - Navigating the File System:
- Absolute Path: Specifies a location from the root directory (e.g.,
/Users/nelle/Desktop). - Relative Path: Specifies a location starting from the current directory (e.g.,
Desktop/shell-lesson-data).
- Absolute Path: Specifies a location from the root directory (e.g.,
Examples
Moving Around the File System
- Finding Your Location:
$ pwd /Users/nelle - Listing Contents:
$ ls -F Applications/ Documents/ Library/ Music/ Public/ Desktop/ Downloads/ Movies/ Pictures/ - Changing Directories:
$ cd Desktop $ pwd /Users/nelle/Desktop - Moving to a Subdirectory:
$ cd shell-lesson-data/exercise-data $ pwd /Users/nelle/Desktop/shell-lesson-data/exercise-data - Moving Up a Directory:
$ cd .. $ pwd /Users/nelle/Desktop/shell-lesson-data - Returning to Home Directory:
$ cd
$ pwd
/Users/nelle
Viewing Hidden Files
- Use
-aoption withlsto show hidden files:$ ls -Fa ./ ../ .bash_profile Applications/ Documents/ Library/ Music/
Getting Help
- Using
--help:$ ls --help - Using
man:$ man ls
Combining Options
- Combine multiple options with a single
-:$ ls -F -a $ ls -Fa
Exploring Other Directories
- List contents of another directory:
$ ls -F Desktop shell-lesson-data/ - Navigate to a specific directory using an absolute path:
$ cd /Users/nelle/Desktop/shell-lesson-data
Shortcuts
- Home Directory Shortcut (
~):$ cd ~ $ cd ~/Desktop - Previous Directory Shortcut (
-):$ cd -
Absolute vs Relative Paths
- Absolute Path: Starts from the root directory.
$ cd /Users/nelle/Desktop - Relative Path: Starts from the current directory.
$ cd Desktop
Tab Completion
- Using Tab to Complete Commands:
$ ls nor[TAB]
$ ls north-pacific-gyre/
Key Points
- The file system manages information on the disk.
- Information is stored in files and directories.
- Directories can store other directories, forming a directory tree.
pwdprints the current working directory.ls [path]lists a directory’s contents.cd [path]changes the current directory.- Most commands accept options that begin with a single
-. - Directory names in paths are separated by
/on Unix and\on Windows. /alone represents the root directory.- An absolute path starts from the root of the file system.
- A relative path starts from the current location.
.means the current directory;..means the parent directory.
This detailed note should help you understand the basics of navigating files and directories in the shell. Practice these commands and explore your file system to become more comfortable with these concepts.
Notes on “Working With Files and Directories”
Overview
- Key Questions:
- How can I create, copy, and delete files and directories?
- How can I edit files?
- Objectives:
- Create a directory hierarchy that matches a given diagram.
- Create files in that hierarchy using an editor or by copying and renaming existing files.
- Delete, copy, and move specified files and/or directories.
Creating Directories
- Checking Current Directory:
$ pwd /Users/nelle/Desktop/shell-lesson-data - Navigating to a Directory:
$ cd exercise-data/writing/ $ ls -F haiku.txt LittleWomen.txt - Creating a New Directory:
$ mkdir thesis $ ls -F haiku.txt LittleWomen.txt thesis/ - Creating Nested Directories:
$ mkdir -p ../project/data ../project/results
$ ls -FR ../project
../project/:
data/  results/
../project/data:
../project/results:
Good Naming Practices for Files and Directories
- Avoid spaces: Use
-or_instead. - Do not begin with
-: Commands treat names starting with-as options. - Use letters, numbers,
.,-, and_: Avoid special characters unless necessary. - Referencing Special Names: Surround names with spaces or special characters in single quotes (
').
Creating Text Files
- Changing Directory and Using a Text Editor:
$ cd thesis $ nano draft.txt - Saving and Exiting in Nano:
- Save:
Ctrl + O, thenEnter. - Exit:
Ctrl + X.
- Save:
- Creating Files with
touch:$ touch my_file.txt $ ls -l my_file.txt $ rm my_file.txt
Naming Conventions
- Use file extensions to indicate file types (
.txt,.pdf,.cfg,.png, etc.).
Moving Files and Directories
- Renaming Files with
mv:$ mv thesis/draft.txt thesis/quotes.txt $ ls thesis quotes.txt - Moving Files to Another Directory:
$ mv thesis/quotes.txt . $ ls thesis $ ls quotes.txt quotes.txt - Moving Files to Another Folder:
$ mv sucrose.dat maltose.dat ../raw/
Copying Files and Directories
- Copying Files with
cp:$ cp quotes.txt thesis/quotations.txt $ ls quotes.txt thesis/quotations.txt quotes.txt thesis/quotations.txt - Copying Directories with
cp -r:$ cp -r thesis thesis_backup $ ls thesis thesis_backup thesis: quotations.txt thesis_backup: quotations.txt
Removing Files and Directories
- Deleting Files with
rm:$ rm quotes.txt $ ls quotes.txt ls: cannot access 'quotes.txt': No such file or directory - Deleting Directories with
rm -r:$ rm -r thesis
Operations with Multiple Files and Directories
- Copying Multiple Files:
$ mkdir backup $ cp creatures/minotaur.dat creatures/unicorn.dat backup/ - Wildcards:
*: Represents zero or more characters.?: Represents exactly one character.- Combining Wildcards:
???ane.pdbmatchescubane.pdb,ethane.pdb,octane.pdb.
- Examples of Using Wildcards:
$ ls *t*ane.pdb
ethane.pdb methane.pdb
Practical Exercises
- Move and Organize Files:
$ mkdir recombined $ mv proteins.dat recombined/ $ cp recombined/proteins.dat ../proteins-saved.dat - Back Up and Send Files:
$ cp *dataset* backup/datasets $ cp *calibration* backup/calibration $ cp 2015-11-* send_to_bob/all_november_files/ $ cp 2015-10-23-* send_to_bob/all_datasets_created_on_a_23rd/ - Organizing Files in Directories:
$ mv fructose.dat analyzed/ $ mv sucrose.dat analyzed/ - Duplicating Directory Structure:
$ mkdir 2016-05-20
$ cd 2016-05-20
$ mkdir data
$ cd data
$ mkdir raw processed
These notes should give you a solid understanding of creating, copying, moving, and deleting files and directories, as well as using wildcards and organizing files efficiently in a Unix shell environment.
Chapter : 4 Pipes and Filters
Last updated on 2024-04-12 | Edit this page
Overview
Questions:
- How can I combine existing commands to produce a desired output?
- How can I show only part of the output?
Objectives:
- Explain the advantage of linking commands with pipes and filters.
- Combine sequences of commands to get new output.
- Redirect a command’s output to a file.
- Explain what usually happens if a program or pipeline isn’t given any input to process.
Introduction
Now that we are familiar with some basic commands, we can explore one of the shell’s most powerful features: combining existing programs in new ways. We will use the shell-lesson-data/exercise-data/alkanes directory, which contains files in Protein Data Bank format, describing simple organic molecules.
Example Files in Directory:
$ ls
cubane.pdb    methane.pdb    pentane.pdb
ethane.pdb    octane.pdb     propane.pdb
Word Count Command:
$ wc cubane.pdb
Output:
20 156 1158 cubane.pdb
wc (word count) counts lines, words, and characters in files.
Using Wildcards with wc:
$ wc *.pdb
Output:
  20  156  1158  cubane.pdb
  12  84   622   ethane.pdb
   9  57   422   methane.pdb
  30  246  1828  octane.pdb
  21  165  1226  pentane.pdb
  15  111  825   propane.pdb
 107  819  6081  total
wc *.pdb shows the total count of lines in the last line.
Displaying Only Line Counts:
$ wc -l *.pdb
Output:
  20  cubane.pdb
  12  ethane.pdb
   9  methane.pdb
  30  octane.pdb
  21  pentane.pdb
  15  propane.pdb
 107  total
The -l option shows only the number of lines per file.
Handling Commands Without Input
Issue with Missing Filename:
$ wc -l
If no filename is provided, wc waits for input from the command prompt. To exit this state, use Ctrl+C.
Capturing Output from Commands
Redirecting Output to a File:
$ wc -l *.pdb > lengths.txt
The > operator redirects the output to a file. If lengths.txt exists, it will be overwritten.
Displaying File Content:
$ cat lengths.txt
Output:
  20  cubane.pdb
  12  ethane.pdb
   9  methane.pdb
  30  octane.pdb
  21  pentane.pdb
  15  propane.pdb
 107  total
cat displays the content of files.
Viewing Content Page by Page:
$ less lengths.txt
less allows scrolling through the file page by page.
Filtering Output
Using sort Command:
Example File (numbers.txt):
10
2
19
22
6
Sorting Numerically:
$ sort -n numbers.txt
Output:
2
6
10
19
22
The -n option sorts numerically rather than alphanumerically.
Sorting and Redirecting:
$ sort -n lengths.txt > sorted-lengths.txt
$ head -n 1 sorted-lengths.txt
Output:
9 methane.pdb
head -n 1 shows the first line of the sorted file.
Important Note: Avoid redirecting output to the same file being processed to prevent data loss.
Appending Data:
$ echo hello >> testfile02.txt
>> appends output to a file.
Passing Output to Another Command
Using Pipes:
$ wc -l *.pdb | sort -n | head -n 1
The | operator pipes output from one command to another.
Combining Commands: Pipes can chain multiple commands together to avoid using intermediate files.
Example:
$ wc -l *.pdb | sort -n | head -n 3
This command finds the three files with the least number of lines.
Tools Designed to Work Together
Unix programs are designed to be simple and work well together using pipes and filters. Each program reads from standard input, processes the data, and writes to standard output.
Example Pipeline:
$ cat animals.csv | head -n 5 | tail -n 3 | sort -r > final.txt
Understanding what passes through each stage of the pipeline is crucial.
Using cut and uniq:
$ cut -d , -f 2 animals.csv | sort | uniq
The cut command extracts columns, and uniq removes duplicates.
Counting Animals:
$ cut -d, -f 2 animals.csv | sort | uniq -c
The -c option with uniq counts occurrences.
Summary
wc: Counts lines, words, and characters.cat: Displays file contents.sort: Sorts lines of text.head: Displays the first few lines.tail: Displays the last few lines.>: Redirects output to a file (overwriting).>>: Appends output to a file.|: Pipes output from one command to another.- Pipes and filters: Combine simple tools to process data efficiently.
Use pipes and filters to link simple programs together, leveraging their ability to process and transform data streams.
Feel free to ask if you need further details or explanations!
Detailed Notes on Loops
| **Last updated on 2023-11-10 | Edit this page** |
OVERVIEW
Loops in programming allow for the repetition of commands or sets of commands for each item in a list. This feature enhances productivity through automation by reducing the need for manual repetition and minimizing typing errors.
QUESTIONS
How can I perform the same actions on many different files?
You can use loops to apply one or more commands to each file in a set.
Objectives
- Write a loop to apply commands to a set of files.
- Trace the values of a loop variable during loop execution.
- Understand the difference between a variable’s name and its value.
- Explain why spaces and some punctuation characters should be avoided in file names.
- Demonstrate how to view and re-run recently executed commands.
Chapter : 5 LOOPS IN SHELL
Basic Structure
A loop in shell scripting is generally used to repeat commands for each item in a list. Here’s the basic structure of a for loop:
for variable in list_of_items
do
    command_using $variable
done
for: Indicates the start of the loop.variable: Holds the current item from the list in each iteration.do: Starts the block of commands to be executed for each item.done: Ends the loop.
Example
Suppose we have several files: basilisk.dat, minotaur.dat, unicorn.dat. We want to print out the classification for each species (given on the second line of each file). Here’s how a loop can solve this:
for filename in basilisk.dat minotaur.dat unicorn.dat
do
    echo $filename
    head -n 2 $filename | tail -n 1
done
Output:
basilisk.dat
CLASSIFICATION: basiliscus vulgaris
minotaur.dat
CLASSIFICATION: bos hominus
unicorn.dat
CLASSIFICATION: equus monoceros
Prompt Behavior
- The shell prompt changes from
$to>to indicate that a multi-line command is being entered. - The
;can be used to separate commands on a single line.
Variable Expansion
Inside a loop, the $ symbol is used to refer to the value of a variable. For instance, $filename gets replaced with the current filename during each iteration.
Naming Variables
- Good Practice: Use meaningful names (e.g.,
filename). - Avoid: Using generic names like
xor misleading names liketemperature.
Looping Over Different Lists
Loops can handle different types of lists, including filenames, numbers, or other data subsets.
VARIABLES IN LOOPS
Loop Over File Extensions
Example: Listing files with .pdb extension:
for datafile in *.pdb
do
    ls $datafile
done
- First Loop:
ls *.pdblists all.pdbfiles in each iteration. - Second Loop:
ls $datafilelists individual files, expanding each file’s name.
Limiting Sets of Files
To limit the files processed:
for filename in c*
do
    ls $filename
done
- Output: Only files starting with
care listed.
Using wildcards like *c* can match different patterns:
for filename in *c*
do
    ls $filename
done
- Output: Matches files with
canywhere in the name.
SAVING TO A FILE IN A LOOP
Part One
If you save the content of each file into alkanes.pdb:
for alkanes in *.pdb
do
    echo $alkanes
    cat $alkanes > alkanes.pdb
done
- Result: Only the content from the last file (
propane.pdb) is saved toalkanes.pdb.
Part Two
Appending content to all.pdb:
for datafile in *.pdb
do
    cat $datafile >> all.pdb
done
- Result: All
.pdbfile contents are concatenated and saved toall.pdb.
MORE COMPLEX EXAMPLES
Example Loop
To select lines 81-100 from each file:
for filename in *.dat
do
    echo $filename
    head -n 100 $filename | tail -n 20
done
- Purpose: Prints filenames and specific lines from each file.
Handling Spaces in Filenames
For filenames with spaces, use quotes:
for filename in "red dragon.dat" "purple unicorn.dat"
do
    head -n 100 "$filename" | tail -n 20
done
- Without Quotes: Errors occur due to spaces being treated as delimiters.
Backing Up Files
To copy files with a prefix:
for filename in *.dat
do
    cp $filename original-$filename
done
- Purpose: Creates backup copies with the prefix
original-.
NELLE’S PIPELINE: PROCESSING FILES
Nelle builds up commands for processing data files with goostats.sh. She uses history commands and arrow keys to edit and re-run previous commands.
Using History Commands
history: Displays recent commands.!number: Repeats a command by number.!!: Repeats the last command.!$: Refers to the last argument of the previous command.- Ctrl+R: Searches command history.
Example with goostats.sh
for datafile in NENE*A.txt NENE*B.txt
do
    bash goostats.sh $datafile stats-$datafile
done
- Result: Processes files and generates corresponding output filenames.
KEY POINTS
- For Loops: Repeat commands for each item in a list.
- Variables: Use
$variableto expand variable values. - File Names: Avoid spaces and special characters to simplify variable expansion.
- History Commands: Use history and shortcuts to repeat or search previous commands.
- Dry Runs: Echo commands to preview what would be executed without running them.
These notes cover the essentials of loops, their usage, and practical examples to enhance your shell scripting skills.
Chapter : 6 Shell Scripts
Last updated on 2023-08-05
Overview
Shell scripts are a powerful way to automate repetitive tasks by saving a series of commands in a file. This file can then be executed to run the commands as a program. Shell scripts enhance efficiency, accuracy, and reproducibility, making them a valuable tool for managing command-line operations.
Objectives
- Write a shell script to execute commands on a fixed set of files.
- Run a shell script from the command line.
- Create a script that operates on files specified by the user.
- Incorporate shell scripts into pipelines for more complex operations.
Creating and Running a Shell Script
-
Creating a Basic Script
Start by creating a new file called
middle.shin thealkanes/directory:$ cd alkanes $ nano middle.shInsert the following line into
middle.sh:head -n 15 octane.pdb | tail -n 5Save the file (Ctrl-O) and exit (Ctrl-X). Execute the script with:
$ bash middle.shThis command will output lines 11 to 15 from
octane.pdb. -
Using Variables in Scripts
To make the script more flexible, edit
middle.shto use a variable for the filename:$ nano middle.sh head -n 15 "$1" | tail -n 5Run the script with:
$ bash middle.sh octane.pdbYou can now use different filenames:
$ bash middle.sh pentane.pdb -
Handling Multiple Arguments
Modify
middle.shto handle additional arguments for line ranges:$ nano middle.sh head -n "$2" "$1" | tail -n "$3"Run the script with:
$ bash middle.sh pentane.pdb 15 5This will extract lines 15 through 19 from
pentane.pdb. -
Adding Comments
Improve readability by adding comments at the top of
middle.sh:$ nano middle.sh # Select lines from the middle of a file. # Usage: bash middle.sh filename end_line num_lines head -n "$2" "$1" | tail -n "$3"
Advanced Scripting Techniques
-
Processing Multiple Files
Create a script
sorted.shto sort files by their length:$ nano sorted.sh # Sort files by their length. # Usage: bash sorted.sh one_or_more_filenames wc -l "$@" | sort -nRun the script with:
$ bash sorted.sh *.pdb ../creatures/*.dat -
Listing Unique Species
Write
species.shto list unique species from multiple files:$ nano species.sh # List unique species from files. # Usage: bash species.sh filename1 filename2 ... cut -d , -f 2 "$@" | sort | uniqRun the script with:
$ bash species.sh animals.csv -
Re-creating Commands from History
Save recent commands to a script:
$ history | tail -n 5 > redo-figure-3.shEdit
redo-figure-3.shto remove history command numbers and extra lines.
Handling Script Errors
-
Debugging Scripts
If a script produces no output, use the
-xoption to debug:$ bash -x do-errors.sh NENE*A.txt NENE*B.txtThe
-xoption will show the commands being executed, helping to identify errors.
Key Points
- Saving Commands: Store frequently used commands in shell scripts for easy re-use.
- Running Scripts: Execute scripts using
bash [filename]. - Arguments: Use
$@for all command-line arguments and$1,$2, etc., for specific arguments. - Quoting Variables: Always quote variables to handle spaces in filenames and other arguments.
- Flexibility: Allow users to specify files or parameters to increase script versatility.
Shell scripts can greatly streamline workflows, making repetitive tasks more efficient and less prone to errors. By leveraging the power of scripting, you can automate complex operations and ensure consistency in your command-line tasks.
Chapter : 7 Finding Things
Overview
This guide explains how to find files and lines within files using Unix commands. It covers the use of grep to search for patterns in text files and find to locate files and directories. It also discusses combining command outputs and handling different types of files, including binary files.
Grep: Finding Lines in Files
Introduction
grep (Global Regular Expression Print) is a command-line utility used to search for lines in files that match a specified pattern. It is highly versatile and can handle a variety of search options.
Basic Usage
To search for a pattern in a file:
grep pattern filename
Examples
- Simple Pattern Search:
$ grep not haiku.txt OUTPUT Is not the true Tao, until "My Thesis" not found Today it is not working - Word Boundary Search:
To search for a whole word, use the
-woption:$ grep -w The haiku.txt OUTPUT The Tao that is seen - Case Insensitive Search:
To make the search case-insensitive, use the
-ioption:$ grep -n -w -i "the" haiku.txt OUTPUT 1:The Tao that is seen 2:Is not the true Tao, until 6:and the presence of absence: - Inverting Search:
To find lines that do not match the pattern, use the
-voption:$ grep -n -w -v "the" haiku.txt OUTPUT 1:The Tao that is seen 3:You bring fresh toner. 5:With searching comes loss 7:"My Thesis" not found. 9:Yesterday it worked 10:Today it is not working 11:Software is like that. - Recursive Search:
To search for a pattern in files within subdirectories, use the
-roption:$ grep -r Yesterday . OUTPUT ./LittleWomen.txt:"Yesterday, when Aunt was asleep and I was trying to be as still as a ./LittleWomen.txt:Yesterday at dinner, when an Austrian officer stared at us and then ./LittleWomen.txt:Yesterday was a quiet day spent in teaching, sewing, and writing in my ./haiku.txt:Yesterday it worked
Advanced Patterns
- Using Wildcards (Regular Expressions):
To find lines with an ‘o’ in the second position:
$ grep -E "^.o" haiku.txt OUTPUT You bring fresh toner. Today it is not working Software is like that. - Combining Commands:
Using
findwithgrep:$ grep "searching" $(find . -name "*.txt") OUTPUT ./writing/LittleWomen.txt:sitting on the top step, affected to be searching for her book, but was ./writing/haiku.txt:With searching comes loss
Find: Locating Files and Directories
Introduction
find is a command-line utility used to search for files and directories that match specified criteria.
Basic Usage
To search for files or directories:
find path criteria
Examples
- Find All Files and Directories:
$ find . OUTPUT . ./writing ./writing/LittleWomen.txt ./writing/haiku.txt ./creatures ./creatures/basilisk.dat ./creatures/unicorn.dat ./creatures/minotaur.dat ./animal-counts ./animal-counts/animals.csv ./numbers.txt ./alkanes ./alkanes/ethane.pdb ./alkanes/propane.pdb ./alkanes/octane.pdb ./alkanes/pentane.pdb ./alkanes/methane.pdb ./alkanes/cubane.pdb - Find Only Directories:
$ find . -type d OUTPUT . ./writing ./creatures ./animal-counts ./alkanes - Find Only Files:
$ find . -type f OUTPUT ./writing/LittleWomen.txt ./writing/haiku.txt ./creatures/basilisk.dat ./creatures/unicorn.dat ./creatures/minotaur.dat ./animal-counts/animals.csv ./numbers.txt ./alkanes/ethane.pdb ./alkanes/propane.pdb ./alkanes/octane.pdb ./alkanes/pentane.pdb ./alkanes/methane.pdb ./alkanes/cubane.pdb - Find Files by Name:
$ find . -name "*.txt"
OUTPUT
./writing/LittleWomen.txt
./writing/haiku.txt
./numbers.txt
Combining Find with Other Commands
- Count Lines in Files Found by Find:
$ wc -l $(find . -name "*.txt") OUTPUT 21022 ./writing/LittleWomen.txt 11 ./writing/haiku.txt 5 ./numbers.txt 21038 total - Find Files and Count Lines with
grepandfind:$ grep "searching" $(find . -name "*.txt") OUTPUT ./writing/LittleWomen.txt:sitting on the top step, affected to be searching for her book, but was ./writing/haiku.txt:With searching comes loss
Handling Binary Files
Introduction
Binary files contain data in formats other than text. grep is designed for text and may not work well with binary files. For binary files, it’s often necessary to convert or extract text-like elements.
Examples
- Convert Binary Data to Text:
Tools like
stringscan be used to extract printable text from binary files:strings binaryfile | grep pattern - Limitations: Complex data extraction from formats like spreadsheets or images may require specialized tools or programming languages.
Key Points
find: Finds files with specific properties matching patterns.grep: Finds lines in files that match patterns.--help: Displays usage information for many commands.man [command]: Shows the manual page for a given command.$([command]): Inserts the output of a command into another command.
Feel free to ask if you need more details on any of these topics!